Zeon Tech have started making a replica of the Big Trak (or bigtrak, or BigTrak, whichever you prefer) so I bought one to see how it'd work as a mobile robotics platform.
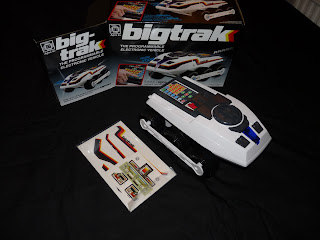
In the box you get the BigTrak, a manual and a pack of stickers to make it look like the illustration on the box. I think having stickers to apply yourself is great, so please continue with that, toy companies. As with the original, the centre wheels are driven and the front and rear axles are free. The front axle on this one allows some vertical movement, although it's not sprung. This presumably allows the machine to keep the weight on the middle wheels at all times, although it does mean it will rock back and forwards a little bit. The whole unit runs off 3 D cells, unlike it predecessor which needed a separate 9V battery, presumably to run the computer.

Underneath, there are plenty of screws to remove. The only difficult one is at the back, highlighted by the yellow arrow here. The plastic moulding on the back will come off with a bit of prodding, and you can see where the clips are if you remove the rest of the screws and open the case up a little. By pressing in in four places, it will come free. Don't bother removing any of the screws from the wheels or the grey drive unit underneath yet.

Once all the screws are removed, you can see inside. The ribbon cable goes up to the membrane keypad, which is unfortunately glued onto the case. However, the glue isn't strong and you can remove the keypad without damaging it. Wires at the front go to the 'photon beam' LED and speaker. One of the first mods you'll probably want to do is snip one of the speaker wires, although it will make programming the existing circuit board more tricky. The other wires go to the battery box and a tiny circuit board on top with the on/off switch and an IR LED; presumably the IR LED is for the trailer attachment, when that comes out. There's a lot of empty space inside the case, which is good news for modifying it.

Removing the ribbon cable and snipping the rest of the wires allows you to remove the drive unit. This is the least destructive way to get the drive unit out, as the controller board is soldered directly to the motors and can't be easily removed. The grey drive unit will now just drop out of the chassis. The circuit board is not particularly interesting, having two chips marked CE3962 which is the model number of BigTrak itself. There's a few discrete transistors on the underside of the board, which are probably the motor drivers. You might be able to modify this to operate the motor off TTL signals, but I'm not particularly interested in using it.
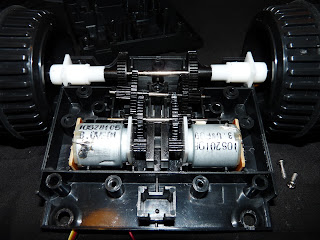
So now the important bit. A few more screws removed and you can see the gearbox. I was expecting this new model to have skimped a bit on the components compared to the original, but this actually looks good - it still has encoders on the second set of gears, and it still has the magnetic clutch between the motors. This clutch keeps the motors in sync if you drive them at roughly the same speed, to improve your chances of driving in a straight line. The motors look small, but they didn't have any problems driving on thick carpet when I briefly tried them.
 I'm pretty happy with this; my next plans are to install my IGEP board on it and connect up a couple of electronic speed controllers to run the motors. You can see the IGEP mounted (not connected to anything at the moment though) and the BigTrak with the (badly) applied stickers to the left. Amazon seem to the be the cheapest place to get them at the moment; I paid £32.48 for one including P&P through a reseller.


